Our Location
304 North Cardinal St.
Dorchester Center, MA 02124

304 North Cardinal St.
Dorchester Center, MA 02124

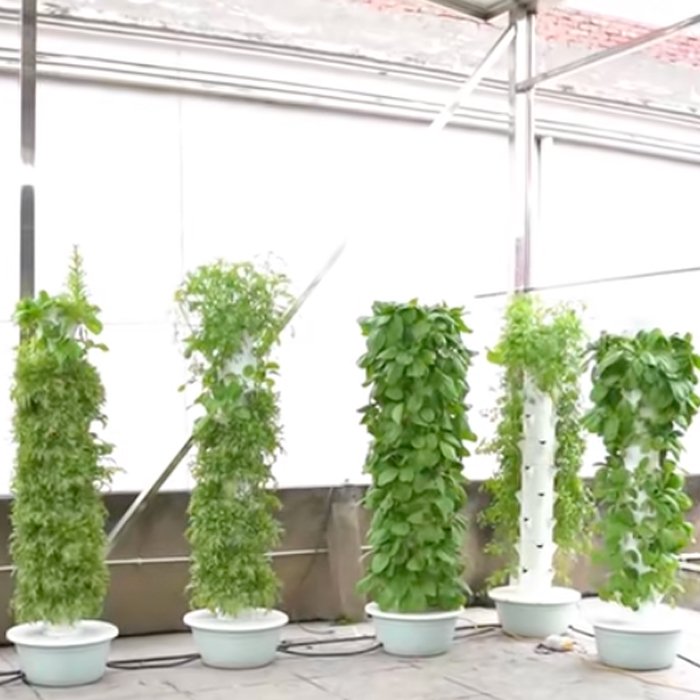
Your last crop is out the door, the totes are packed, and for one short window — usually a single working day — the entire economics of the next harvest are still undecided. This is the between-crop window, and how you use it separates a system that runs clean for eight to twelve weeks from one that limps into week three with slime in the gutters, brown roots, and a yield curve that never recovers.
There is a reason experienced commercial growers treat sanitation as a production cost line and not a chore. Pathogens do not disappear when you pull the plants. They sit in the biofilm that coats every inner wall, in the mineral scale inside your drip lines and emitters, in the pump impeller, and in the root fragments that never quite made it out of the bottom of the tower. The next crop is planted directly into that inoculum.
This guide lays out the exact sanitation protocol we recommend for tower systems: when to deep clean, what to have on hand, the sanitizer doses that actually work, an eight-step sequence you can teach a crew, and the mistakes that send growers straight back to the same root rot they thought they had solved.
Consider what is physically left in the system after harvest. A tower that has run a full lettuce cycle carries a living layer of biofilm — a mixed community of bacteria, fungi, and algae bound in a polysaccharide matrix that is genuinely difficult to remove with a garden hose. That biofilm is the perfect nursery for the organisms you least want: Pythium and Phytophthora zoospores, Fusarium, Rhizoctonia, and the fungal gnat larvae that vector them from tower to tower.
The multiplication math is unforgiving. One infected plant can release thousands of zoospores into a recirculating system within 24 to 48 hours, and a shared reservoir means every tower downstream receives them. Once established in a mature crop, root rot is a management problem, not a solved one — which is exactly why the between-crop window is where you win it. If you are already fighting symptoms mid-cycle, start with our guide to fixing yellow leaves, root rot, and slow growth in hydroponic towers, then come back here and close the loop between crops.
Growers who adopt a strict between-crop protocol typically report two things: fewer mid-cycle disease interventions, and a yield curve that repeats instead of drifting downward crop after crop. That consistency is worth more than any single yield spike, because it is what makes a business plan and a supply contract bankable — the same logic behind the numbers in our yield per square foot production data.
A single rule covers 90% of operations: every crop turn gets a full clean, with intensity scaled to what happened in the previous crop. A six-week lettuce cycle, a basil cut-and-come-again rotation, and a nine-month strawberry run all have different risk profiles, so make the decision in advance rather than on the day.
Treat these as hard triggers that override a light cleaning schedule:
Slot these windows into your planting plan rather than treating them as emergencies. A crop calendar with a booked sanitation day between rotations keeps customer delivery dates intact, and it prevents the classic squeeze where a grower plants into a dirty system because the transplant date has already slipped. Our year-round crop planning guide shows how to build sanitation days into a twelve-month schedule.
The single biggest cause of a failed clean is equipment that has to be borrowed from the growing side of the operation. Build a kit that lives in one tote, is never used on live plants, and gets restocked at the start of every cycle.
| Item | Why you need it | Spec / note |
|---|---|---|
| Fan-nozzle hose or small pressure washer | Lifts biofilm and root debris off tower walls without cracking plastic | Keep under 1,000 psi and never aim directly at joints |
| Tower-length tube brush + bottle brushes | Mechanically breaks biofilm inside vertical channels and gutters | Dedicate one brush per separate system to avoid cross-contamination |
| Flexible line brush or drain snake | Clears drip lines, manifolds, and spray lines | Sized to your tubing ID — the most-missed component |
| pH and EC meters | Verifies final rinse water and post-restart solution | Calibrate before every sanitation day |
| Food-grade hydrogen peroxide 3% or 12% | Primary sanitizer for biofilm and organic load | Dilute 12% down to 3% before use; store opaque and cool |
| Hypochlorous acid (HOCl) solution | Fast-contact sanitizer with low residue risk at dose | 200-500 ppm free chlorine; verify with test strips |
| Chlorine test strips (0-500 ppm) | Proves your dose and proves your rinse | Cheap, and the only way to know residue is gone |
| Mixing tote or drum (100-200 L) | Makes a full-system sanitizer charge with a repeatable dose | Mark volume lines on the side in liters |
| Spare circulation pump + air stones | Keeps solution moving through every line during contact time | Never share with the nutrient mixing station |
| Nitrile gloves, splash goggles, apron | Sanitizers at working strength are irritants | Full face shield for peracetic acid blends |
| Dedicated bin for plugs and media | Quarantines suspect grow media instead of returning it to the tower | Label “DO NOT REUSE” and empty it every cycle |
Mixing safety, without exception: never combine chlorine bleach with acid, ammonia, or peroxide-based product in the same vessel. Add sanitizer to water, never water to concentrated sanitizer. Mix outdoors or with ventilation, in the volume you will actually use, because diluted peroxide loses strength within hours in light and warmth. If you do not have a calibrated way to measure free chlorine, get test strips before you run your first deep clean — dose guessing is how both failed sanitizing and phytotoxic burns happen.
Follow the steps in order. The sequence matters as much as the chemicals: debris removal before sanitizing, contact time before rinsing, and rinse verification before anything living goes back in. For a room of 10 to 20 commercial towers, budget three to five hours of wall-clock time with one or two people, most of it contact time you can spend on other work.
Cut the remaining marketable crop first so nothing edible is exposed to sanitizer. Then shut off the pump, isolate the circuit, and drain the reservoir and every tower column completely. Open the lowest drain point on each tower — standing solution in tower bases is where the worst contamination hides. Do not dump this water onto production beds or compost that will touch future grow media.
Pull every net pot, plug, and media cube. Shake out loose media into a waste bin, then inspect the plug itself: if it holds brown, slimy, or foul-smelling roots, it goes in the quarantine bin, not back into rotation. Lift out any root mat that has grown down into the tower base or channel, and remove fruit, leaf litter, and dead tissue from gutters. Confirm the tower channels are visually empty before you wet anything — a rinse over leftover root mass simply spreads the problem.
Rinse top-down with cold or ambient water, then scrub. This step does more work than the sanitizer: sanitizer kills what it touches, and biofilm is designed to prevent contact. Work a tower-length brush through each vertical channel, scrub the reservoir walls and lid, and run a line brush through every drip line and manifold. Pay specific attention to the tower base, the drain fitting, and any 90-degree elbow — these are the three places contamination survives most often. Expect the rinse water to come out visibly dirty on the first pass and clear by the second.
If mineral scale is heavy, a brief acid rinse (food-grade citric or phosphoric at label dilution) before scrubbing will loosen it. Never combine that acid rinse with a chlorine-based sanitizer in the same charge.
Now choose your chemistry. The table below reflects what works in practice in recirculating tower systems; dose and contact time together decide the result, and more is not better — over-strength chlorine is the fastest way to burn the next crop’s young roots and corrode metal fittings.
| Sanitizer | Working dose | Contact time | Best for | Watch-outs |
|---|---|---|---|---|
| Hydrogen peroxide, food grade (3% ready-to-use) | 3-5 mL per liter (roughly 1-1.5 oz per gallon) | 30-60 min circulating | General biofilm loosening and organic load; low residue risk | Breaks down in light and heat — mix fresh, use an opaque tank |
| Hydrogen peroxide 12% concentrate | Dilute to 3% before use | 30-60 min circulating | Large systems where buying 3% is uneconomical | Corrosive neat — always add to water, never the reverse |
| Hypochlorous acid (HOCl) | 200-500 ppm free chlorine | 10-20 min circulating | Fast kill with low phytotoxicity at dose; strong final-flush option | Strength drops in storage — verify with test strips every use |
| Sodium hypochlorite (chlorine bleach) | 100-200 ppm free chlorine | 15-30 min circulating | Cheapest option, universally available | Requires thorough rinsing; never mix with acid or ammonia; attacks metal |
| Peracetic acid blend | 0.1-0.2% | 10-15 min circulating | Heavy organic load or a confirmed disease event | Pungent, full PPE, aggressive on some plastics at high dose |
A worked example: for a 200 L reservoir charge on a ten-tower room, 600-1,000 mL of 3% hydrogen peroxide gives the standard dose, or 40-100 mL of a 500 ppm hypochlorous stock depending on label strength. Write the numbers on the wall of your mixing station. Crews sabotage good protocols by improvising doses at the end of a long day.
If disease pressure in the last crop was high, run the sanitizer twice with a rinse between, rather than doubling the concentration once. Two clean contacts beat one harsh one.
Fill the reservoir with the sanitizer charge, run the pump, and let it circulate long enough that every emitter sees fresh solution for the full contact time. Then pull every nozzle, dripper, and emitter and soak them in a bucket of the same solution. Nozzles are the single most-overlooked contamination site in tower systems: they are dark, wet, and constantly fed with nutrient film, and a partially clogged nozzle both spreads inoculum and starves the plants below it.
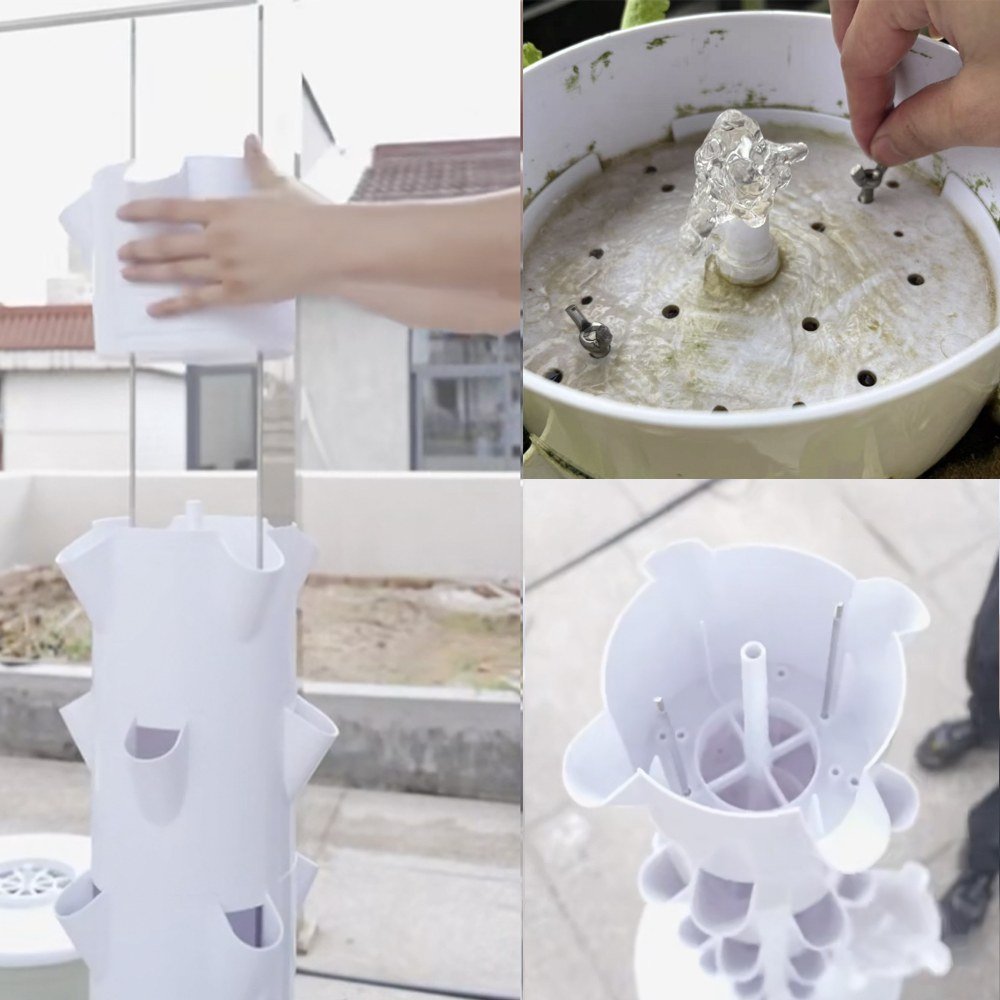
While the solution circulates, check flow at the top and bottom of each tower. Uneven flow after cleaning usually means a partially blocked line, and it is far easier to clear now than mid-crop when the plants are already stressed.
Drain the sanitizer charge and turn to the hardware. Open the pump housing and clean the impeller and volute — a biofilm mat on an impeller is a permanent reservoir of organisms that will re-inoculate your clean system within days. Pull and rinse filter screens, soak air stones, and wipe down the inside of the reservoir, including the waterline ring where algae and scale accumulate. Replace anything that is cracked, brittle, or too stained to verify as clean: filters and air stones are consumables, not permanent parts.
Refill with clean water and circulate for 15 to 20 minutes, then drain. Repeat until the drained water tests clean. Verify chemically rather than by eye: a chlorine test strip on the final rinse water should read 0 ppm free chlorine, and the rinse water’s EC should be within 0.1-0.2 of your source water. That EC check catches the case where you have rinsed away the sanitizer but left a concentrated mineral film behind, which will shock young transplants.
This is the step crews skip when they are behind schedule, and it is the step that most often causes the failure they then blame on the next crop’s genetics or the nutrient formula. Any residual chlorine or peroxide in the system hits the most vulnerable tissue in the plant’s life — freshly transplanted roots.
Refill with fresh water, then mix nutrients to your target EC and pH before any plants go in — not after. Check both with calibrated meters and confirm they hold steady for an hour. Reinstall cleaned nozzles and lines, restart the pump, and walk the room verifying flow at every level.
If you rely on beneficial microbes or biological root treatments, this is when they go in — after sanitizing, never before, because they would be killed by the very chemistry you just used. If you need a refresher on target ranges and how to adjust them without chasing numbers, our water quality and pH management guide and the nutrient solution formulation guide cover both.
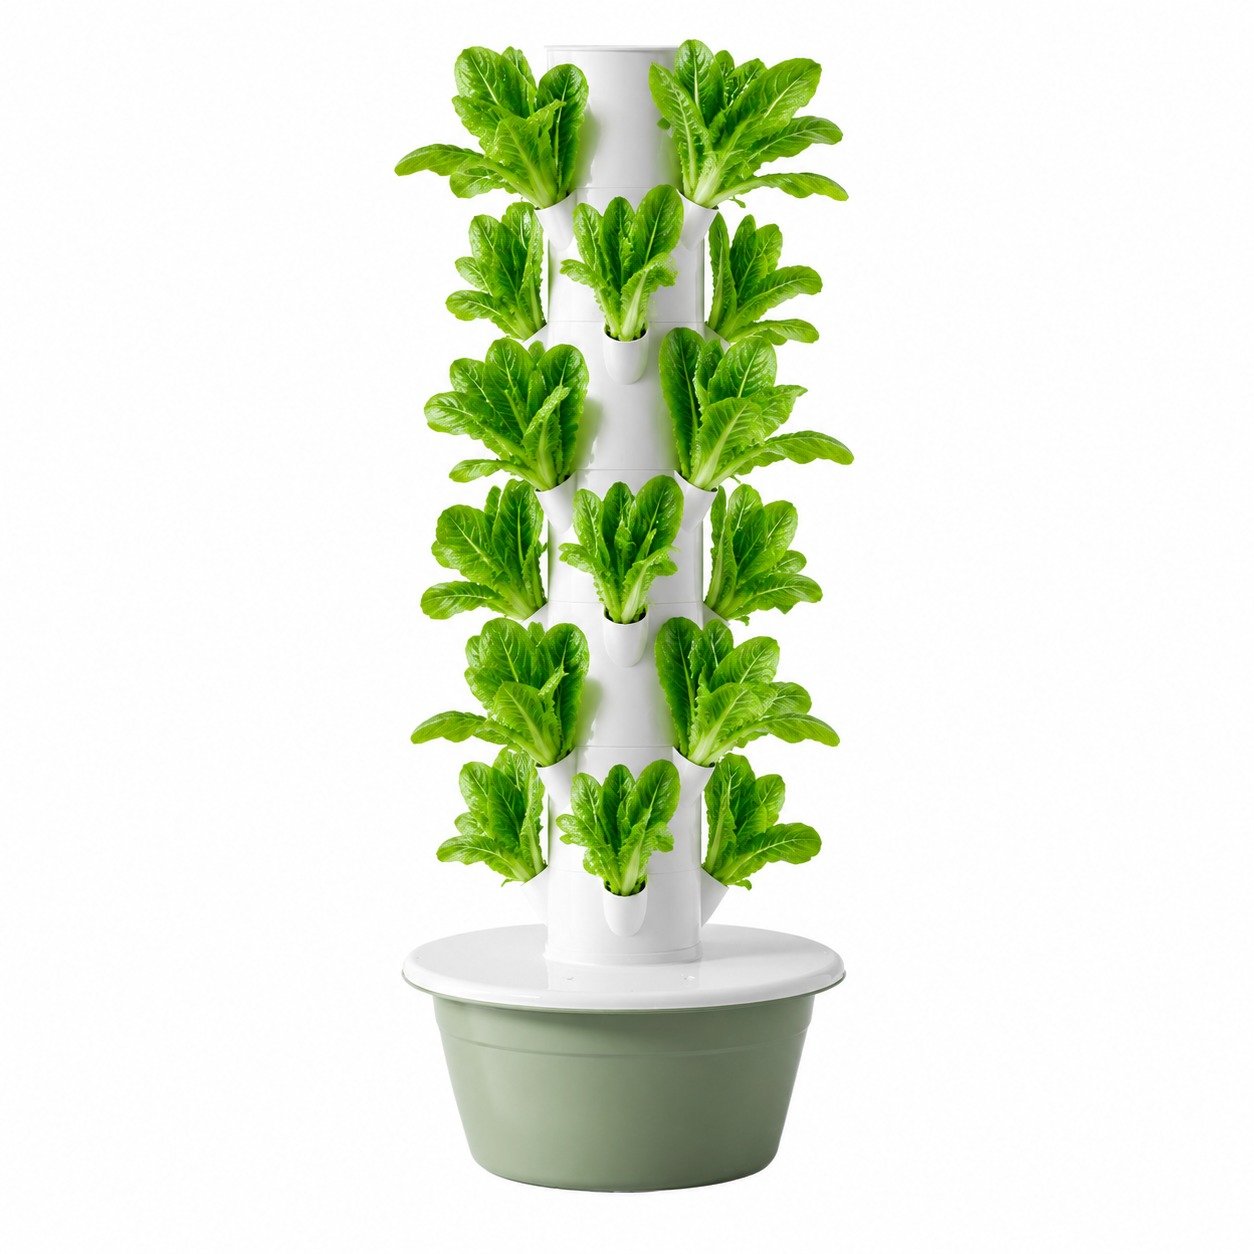
Not every cycle needs the full protocol at full strength, but every cycle needs a decision made in advance. Use the table below as a starting point and tighten it if your operation has a disease history.
| Your situation | Cleaning level | Frequency |
|---|---|---|
| Leafy greens and lettuce, single harvest, high density | Full 8-step protocol | Every crop turn (roughly every 6-8 weeks) |
| Basil and culinary herbs, cut-and-come-again | Full 8-step protocol | Every crop turn |
| Tomatoes, peppers, strawberries, long-season fruiting crops | Full protocol between seasons, line flush every 4-6 weeks | One to two full cleans per year |
| Root rot, Pythium, or wilt confirmed in the previous crop | Full protocol plus replacement of all grow media | Immediately, before replanting |
| Visible algae bloom | Full protocol plus a light-exposure review | Immediately |
| Restart after two or more weeks of downtime | Full protocol | On every restart |
| Same crop back-to-back with no disease history | Full protocol recommended; shortcut only with a verified mid-level flush | Every crop turn |
A protocol that lives in one person’s head is a single point of failure. Write it down, assign owners, and put the time and cost numbers on the sheet so nobody has to guess whether the day is on track. The table below reflects a 20-tower commercial room and two people.
| Phase | Owner | Time per 20-tower room | Consumables |
|---|---|---|---|
| Drain and strip plants, plugs, and root mass | Lead grower | 45-60 min | — |
| Scrub down, brush lines, first rinse | Lead grower + 1 | 60-90 min | Water |
| Mix sanitizer and circulate to full contact time | Lead grower | 40-55 min | $6-15 sanitizer |
| Soak nozzles, clean pump, filter, reservoir | Lead grower | 30-45 min | $2-5 gloves and brushes |
| Final rinse and residue verification | Lead grower | 25-35 min | $1-3 test strips |
| Restart, mix nutrients, verify flow | Lead grower | 20-30 min | Nutrients |
| Total | Two people | 3.5-5.5 labor hours | $10-25 per 20 towers |
That works out to roughly 10 to 16 minutes of labor and under a dollar fifty in chemistry per tower, per crop turn. Compare that with a disease event that costs you a full cycle on even a handful of towers, plus the intervention time and the discounted produce you still have to move. As long as your labor and consumables stay in that range, sanitation is one of the highest-return hours in the operation.
Keep the sanitized-bin rule and the dose sheet posted at the mixing station, and log the date, dose, and contact time for every clean. When a crop does go wrong, that log is the difference between diagnosing a real problem and guessing.
You can, and many growers start there. Use it at 100-200 ppm free chlorine with 15 to 30 minutes of contact time, rinse thoroughly, and verify with a test strip. Bleach is cheap and effective, but it is unforgiving: never mix it with acid or ammonia, and be aware it corrodes metal fittings faster than hypochlorous acid. If your system has exposed metal in the plumbing or pump housing, HOCl is the safer daily choice.
Not at working strength with proper rinsing — but concentrated product poured neat will burn roots and damage plastic. The reason peroxide is popular for between-crop work is the same reason it needs care during use: it breaks down into water and oxygen, which limits residue risk, but it also loses strength quickly in warm or lit conditions, so mix it fresh and use it the same day.
Not automatically. Rockwool and similar media can be reused when the crop was healthy and the cube holds its structure. Replace media when the previous crop showed disease, when the cube is compressed, crumbling, or saturated with algae, or when root tissue is embedded in the cube. At commercial scale, replacing suspect media always costs less than treating a system-wide outbreak.
Three objective checks: a 0 ppm chlorine reading on the final rinse water, a rinse-water EC within 0.1-0.2 of source water, and a visual inspection of the tower base, drain fitting, and one elbow in each column after the final rinse. If you find a slippery film anywhere, the biofilm survived and the clean is not finished.
No. Sanitizers at working strength are non-selective, and any solution strong enough to remove biofilm will damage live roots and foliage. Mid-cycle hygiene is a different job — flushing lines, clearing algae, managing solution — described in our hydroponic tower maintenance checklist. Save the chemistry for the empty system, and see the reservoir management schedule for how often to change solution while a crop is running.
Treat it as part of the same day. Sweep and wipe floors and drainage, clean tool handles and screens, discard culled plant material away from the growing area, and wash any clothing or gloves that contacted diseased roots. If you also propagate in-house, clean the propagation area and trays the same week so you are not transplanting clean seedlings into a contaminated nursery. Our transplanting guide and the seed-to-harvest planting guide both assume a sanitized starting point.
Sanitation is not glamorous work, and it is easy to shorten when deliveries are due and the crew is tired. But it is the one task in a tower operation whose output is repeatability: the same yield next cycle, the same disease-free crop, the same delivery dates your customers plan around. Eleven to sixteen minutes of labor per tower, once every rotation, buys all of it.
If you are specifying a new tower system, tell us what sanitation workflow you need to run. Our commercial towers are built with removable bases, accessible nozzles, and smooth internal channels so a full clean is fast and verifiable — not a wrestle with glued joints and hidden corners. Send us your crop plan and target cycle length and we will map the sanitation window and the component access you need onto the right configuration.
